
Quick guide to install ethanol conversion kit (eFlexFuel) on 2002-2008 Toyota Corolla (E120).
I was inspired by ChrisFix’s latest video on how to install a ethanol conversion kit: How To Install A Flex Fuel e85 Conversion Kit In Your Car (DIY) . Following this guide is basically this video, but specific to 2005 E120 Corolla.
What you need
- Flexfuel conversion kit For example, eFlexFuel.
- Rags and brake cleaner for cleaning up fuel you will spill.
- Double sided tape. Double sided Velcro is better if you want to remove the kit someday.
- Good pair of cutters or really sharp knife to cut the fuel hose.
- 10mm socket and wrench.
- Small pliers if you are having problems removing injectors.
- Philips 2 or 3 screwdriver for the hose clamps.
- Working multimeter.
- Approx two hours of time.
- Optional: Metal and metal tools to make a bracket for the ethanol sensor.
Table Of Contents
Step 1, cool down your engine and disconnect battery!
Really, make sure your engine is at maximum, warm to your touch. You WILL spill some fuel, and you do not want it to ignite in your enginebay. Also disconnect your battery.
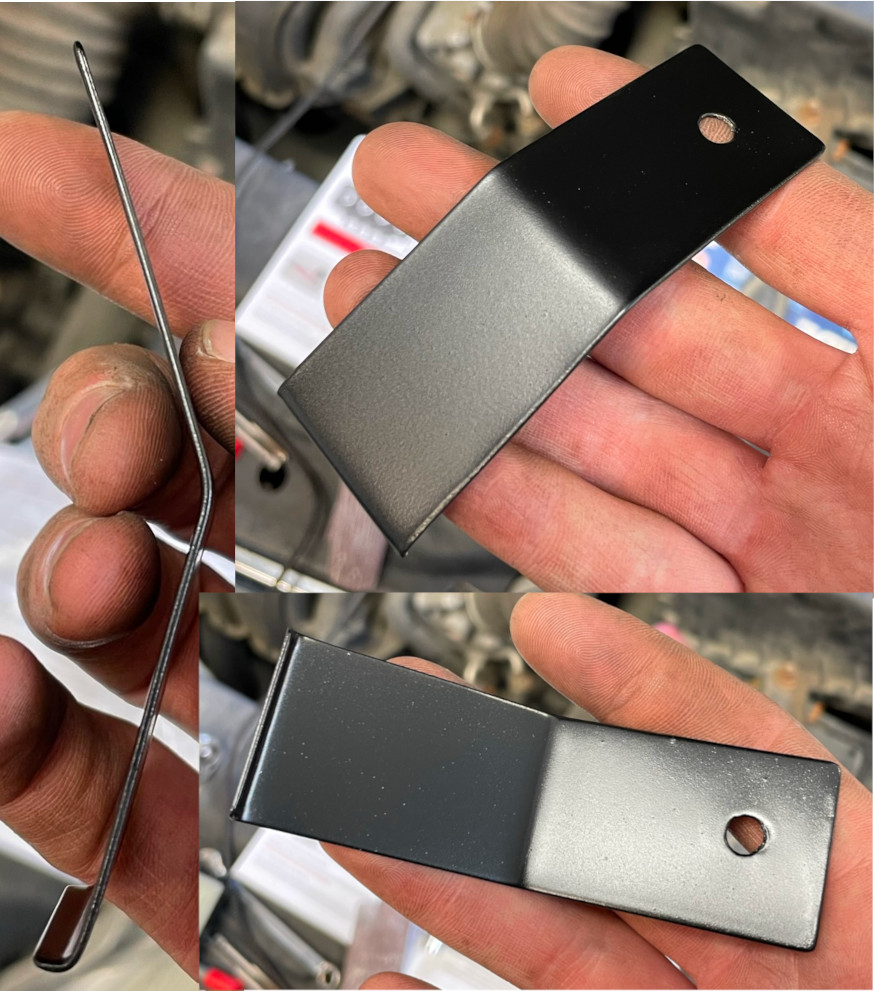
Step 1.5, make a bracket (while engine cools down)
There is a perfect spot just above the engine, right where the fuel lines make a u turn. The bracket can be made from any metal you have in hand, as it does not need to actually hold any weight. The fuel lines will keep the sensor approx where you cut the lines, but the bracket makes sure that the sensor doesnt just willy nilly move around the engine bay.
I made the bracket from 1mm steel and painted it with two layers of black self-etching paint.
Sensor is attached with a ziptie to the bracket and the bracket is attached to one of the heat/noise shield holders with the original plastic “nut”.
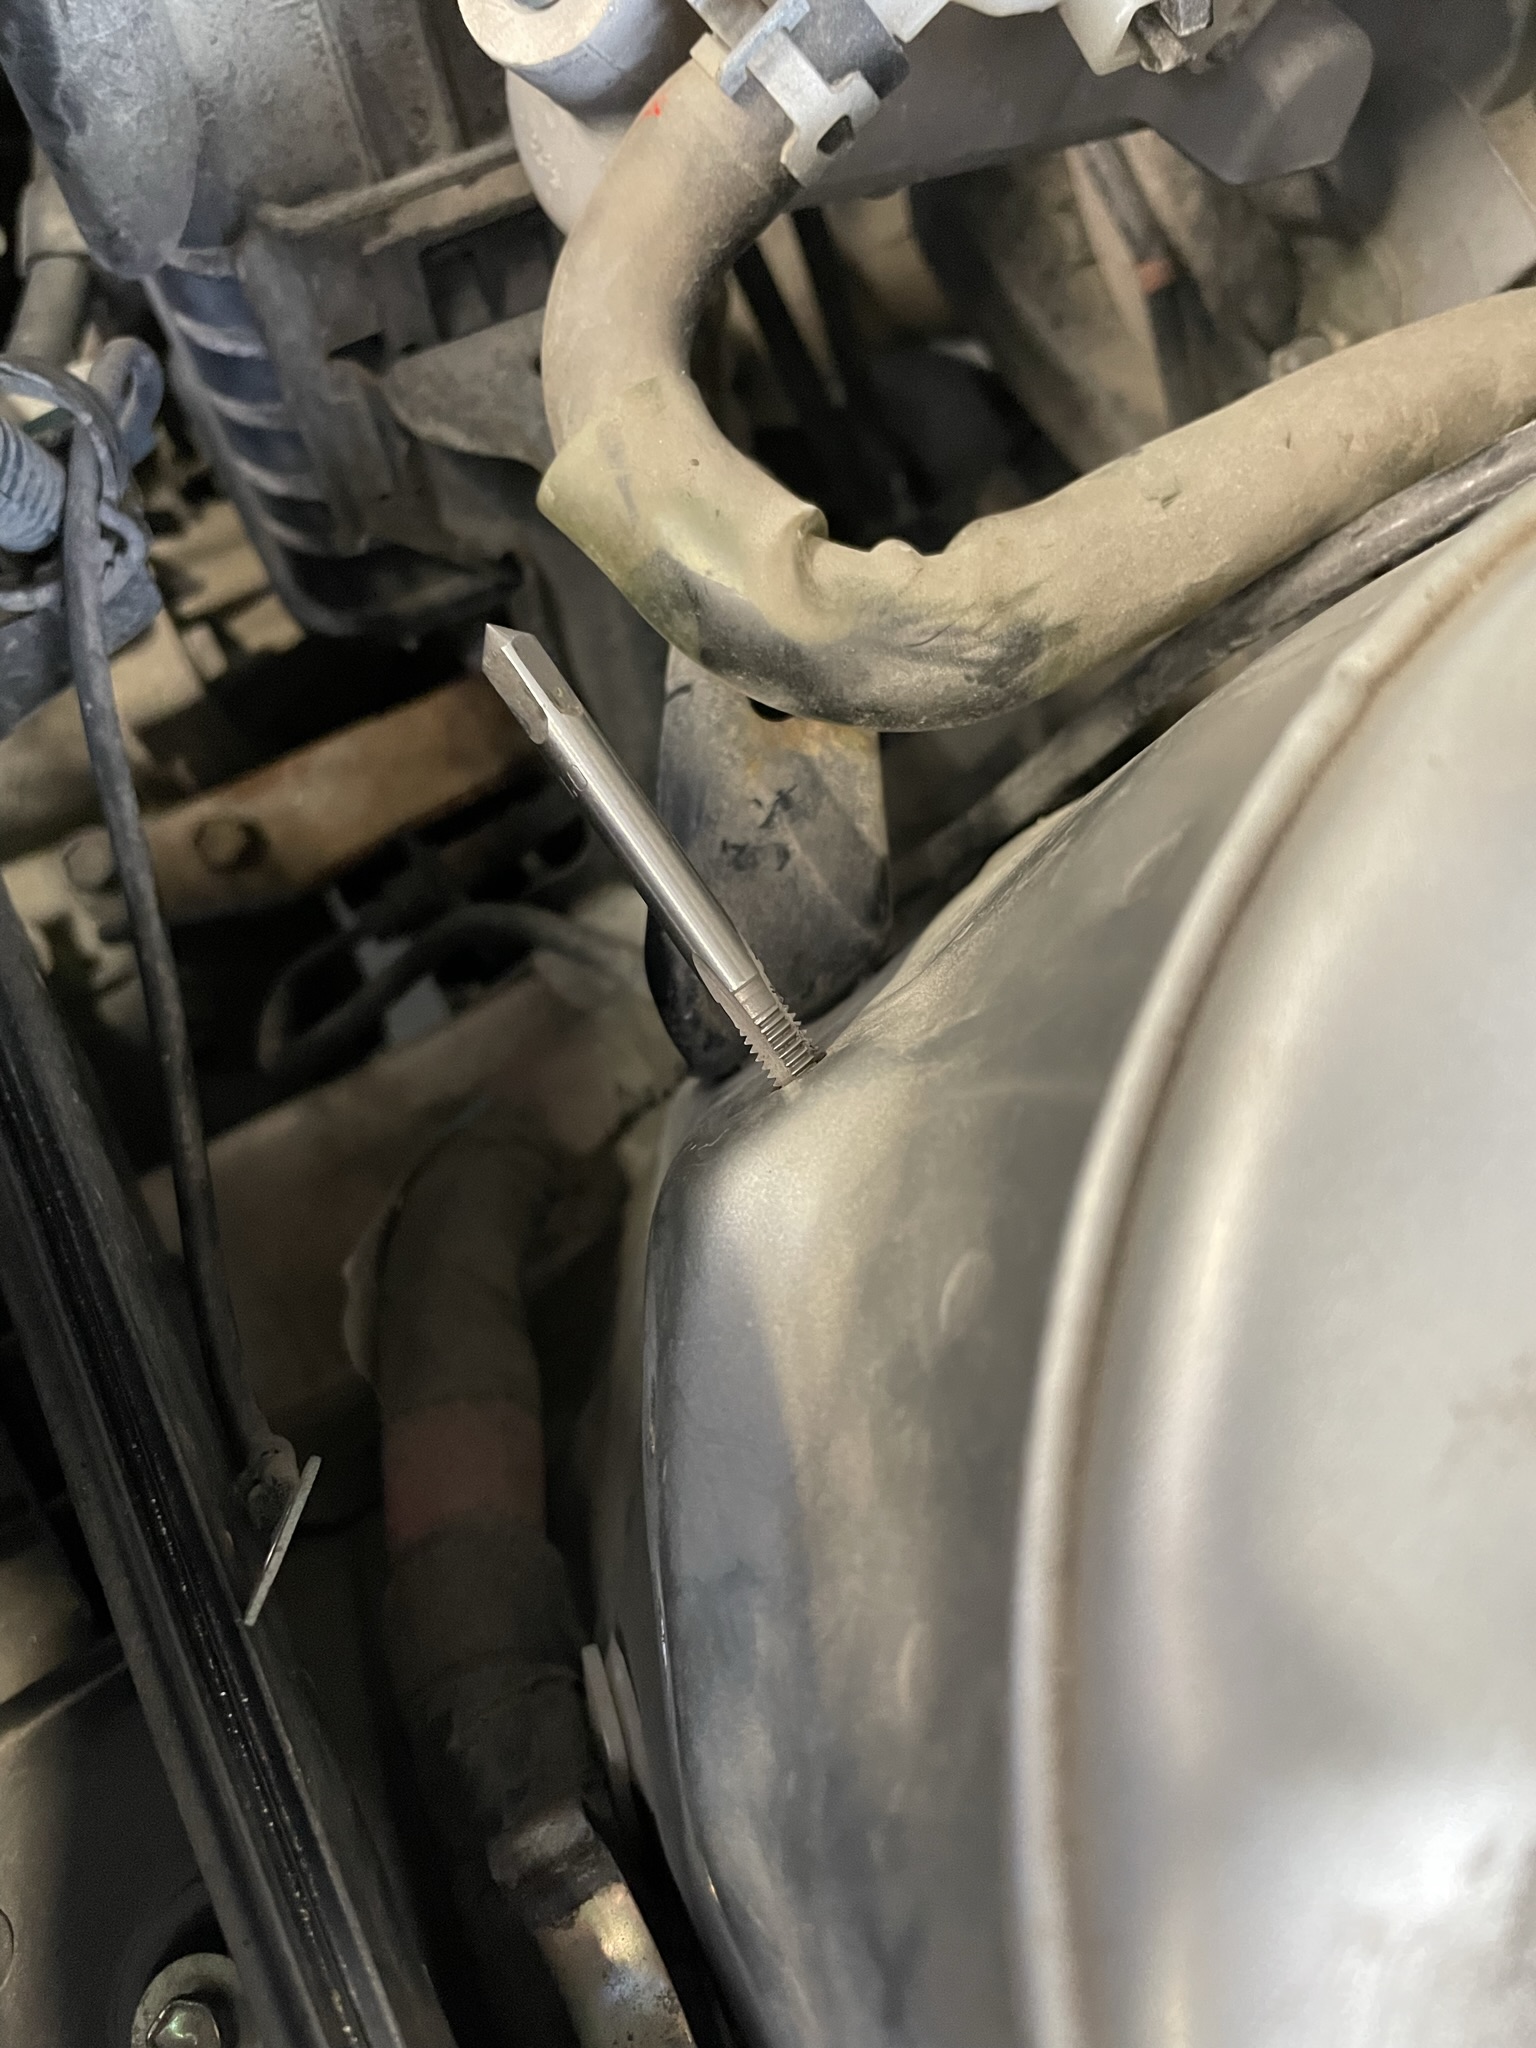
Step 2, remove fuel hoses.
First, open you gas cap. This will make sure the fumes do not push fuel out of the line when you open it.
The kit includes tool for removing the fuel rail side fuel hose. It’s ok, but too large to fit inside the connector to work. You will need to trim the edges sharper and remove some material from the top to make the tool fit. Try pushing the fuel hose towards the removal tool and then push back with the tool to jam it inside to connector.
Beware, there will be fuel. And when you think there will be no more fuel, there will be more…
Pump side is a lot easier, it uses a push lock style connector, where you just push the grey “buttons” and pull the connector out of the fuel line.
Step 3, make new hoses.
Cut the hoses like in this picture if you have made a bracket to same place as I had done.
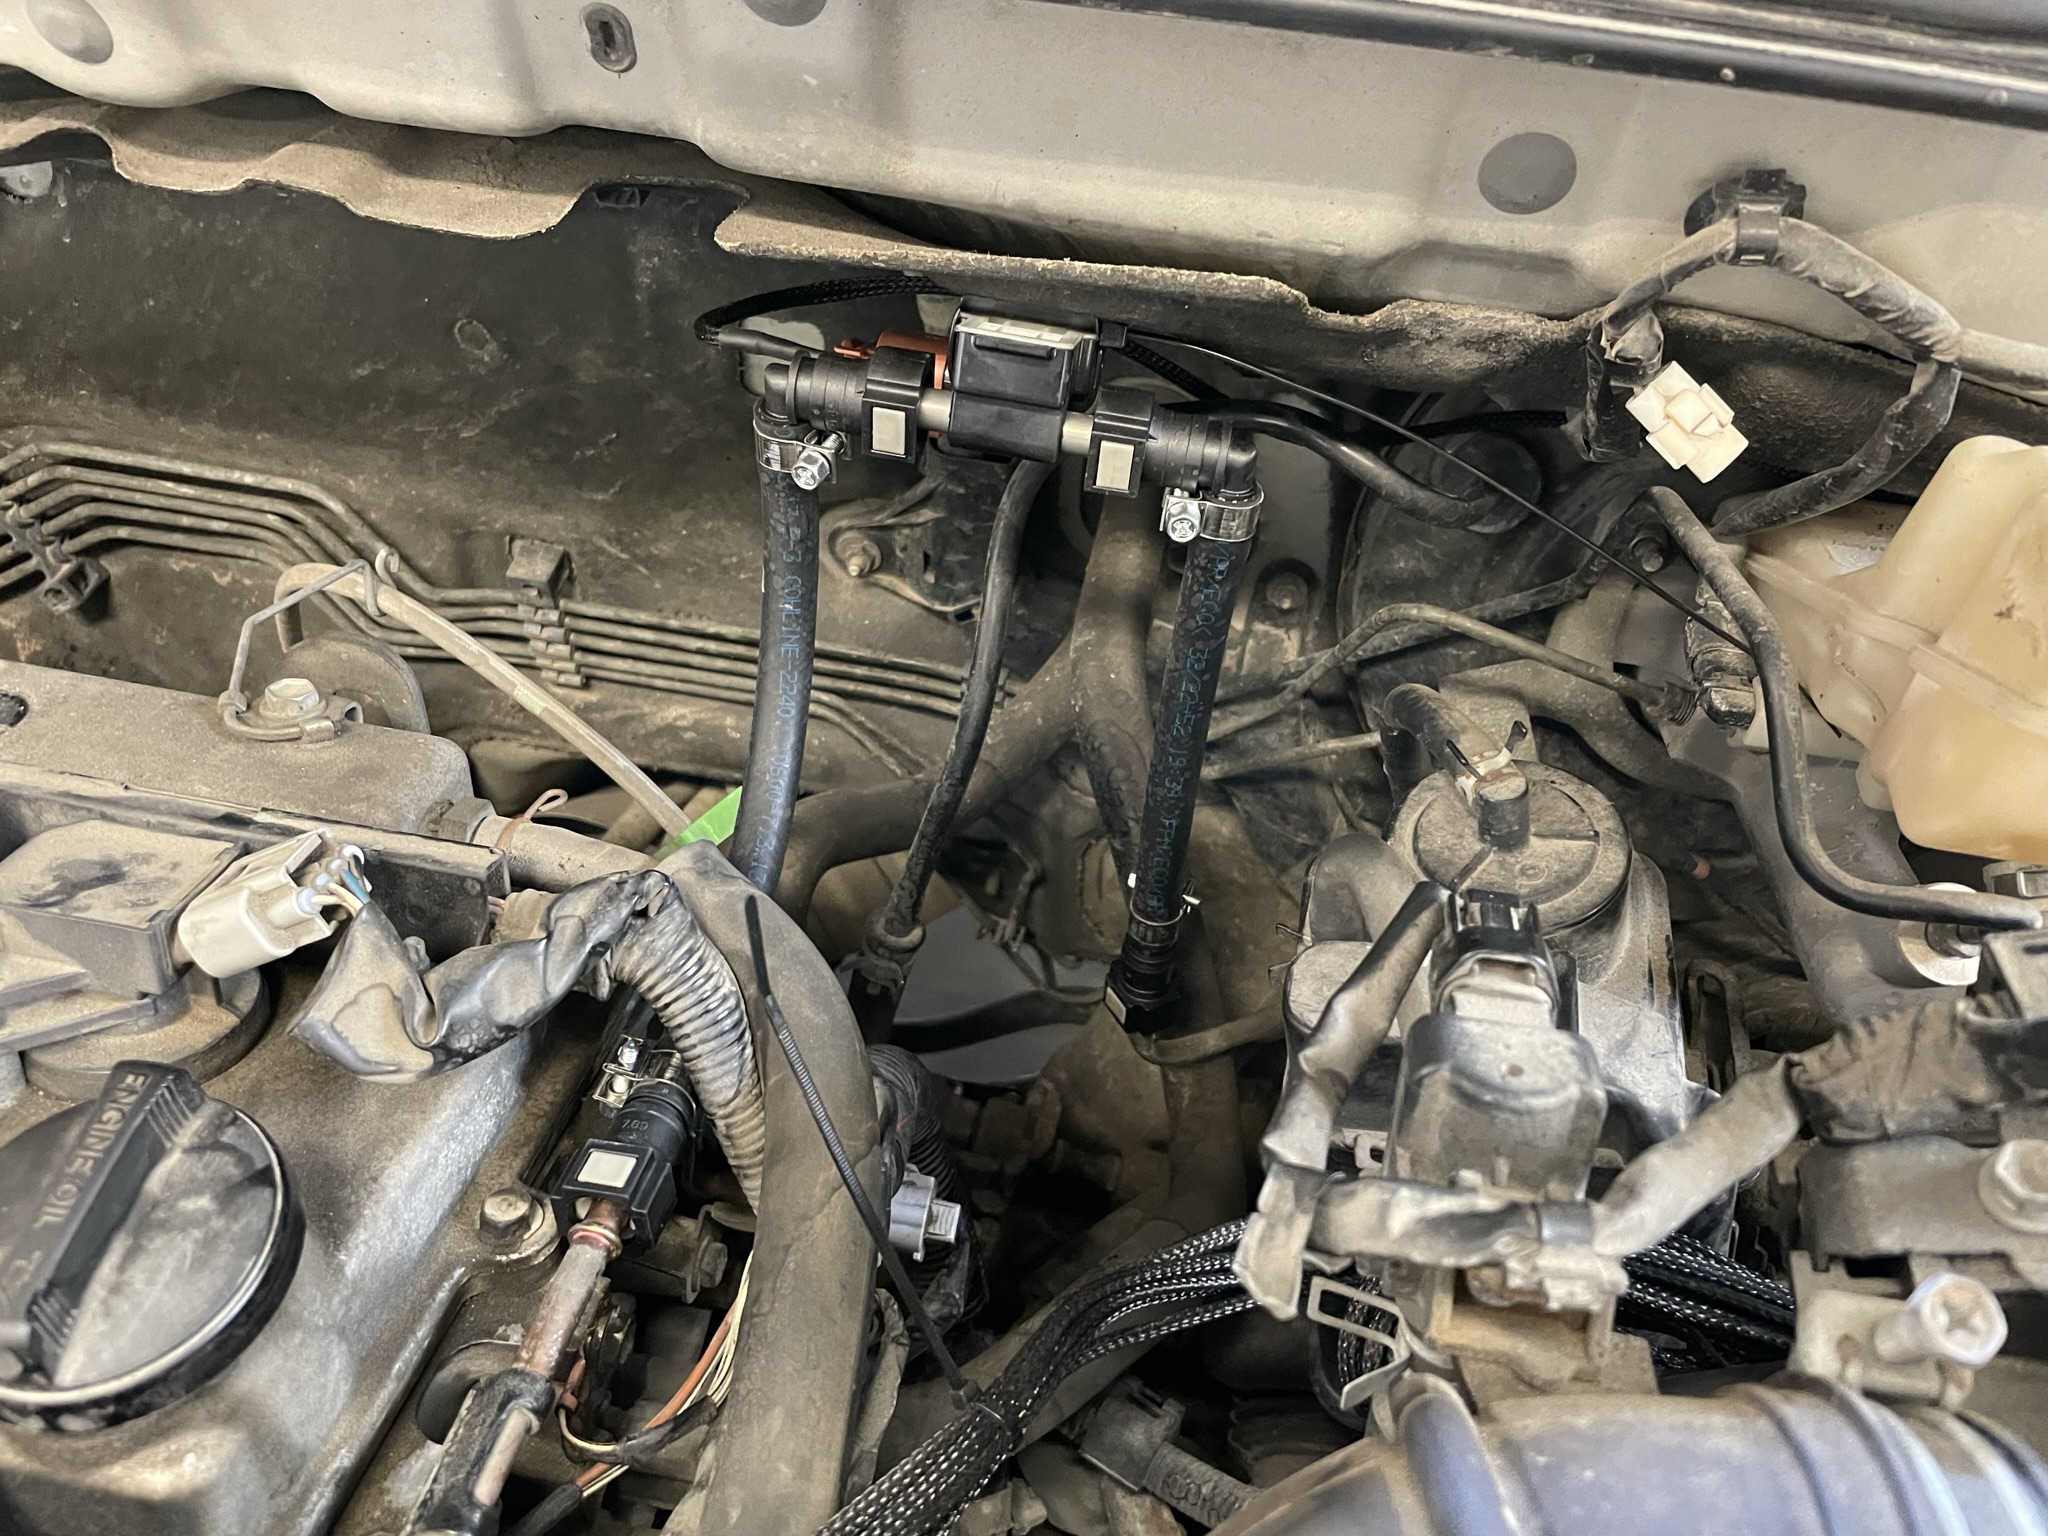
Make sure you use the correct size of connector. The old connectors usually have the size printed out on one side. Also tighten the hose clamps tight enough that you cant remove the hose from connector, but not so tight that you crush the connector/hose.
Step 4, connect new hoses.
When you have your hoses made, connect them to the fixed fuel line, flexfuel sensor and fuel rail. Lube the male side of lines first with small amount of engine oil, so you do not break the seals while pushing the connectors on.
Connector is good when it clicks and you cannot remove it by pulling it a bit.
Now the sensor is ready to sense ethanol contents of the fuel and change injector timing depending on the percentage of ethanol (more ethanol in fuel -> more injector time)
Step 5, injector loom.
- Remove engine cover (held on with four 10mm nuts/bolts).
- Remove all injector plugs.
- Set your multimeter to continuity test.
- Test which side is positive by attaching one lead of the multimeter to one of the injector wire and probe same wire from another injector. If you hear a beep from multimeter, thats the positive side, as all the injector positives are connected to same source. On this Corolla, the injector loom plugs had red weather seal to indicate positive lead.
- Plug in the flexfuel male connector to any injector.
- Insert the flexfuel wiring loom pins into the provided connector housings by pushing them inside until you hear a click. Make sure you have the red positive wire goes to the plus wire on the engine wiring loom.
- Plug in the connector and repeat for all other injectors.
- Add the temperature sensor probe somewhere near injectors. It does not need to be attached to anything, as it will just measure ambient temperature to know if you are doing a cold start or a hot start.
- Ziptie the wires to the engine wiring loom with included zipties.
Few pictures for reference:
Injector loom completed:
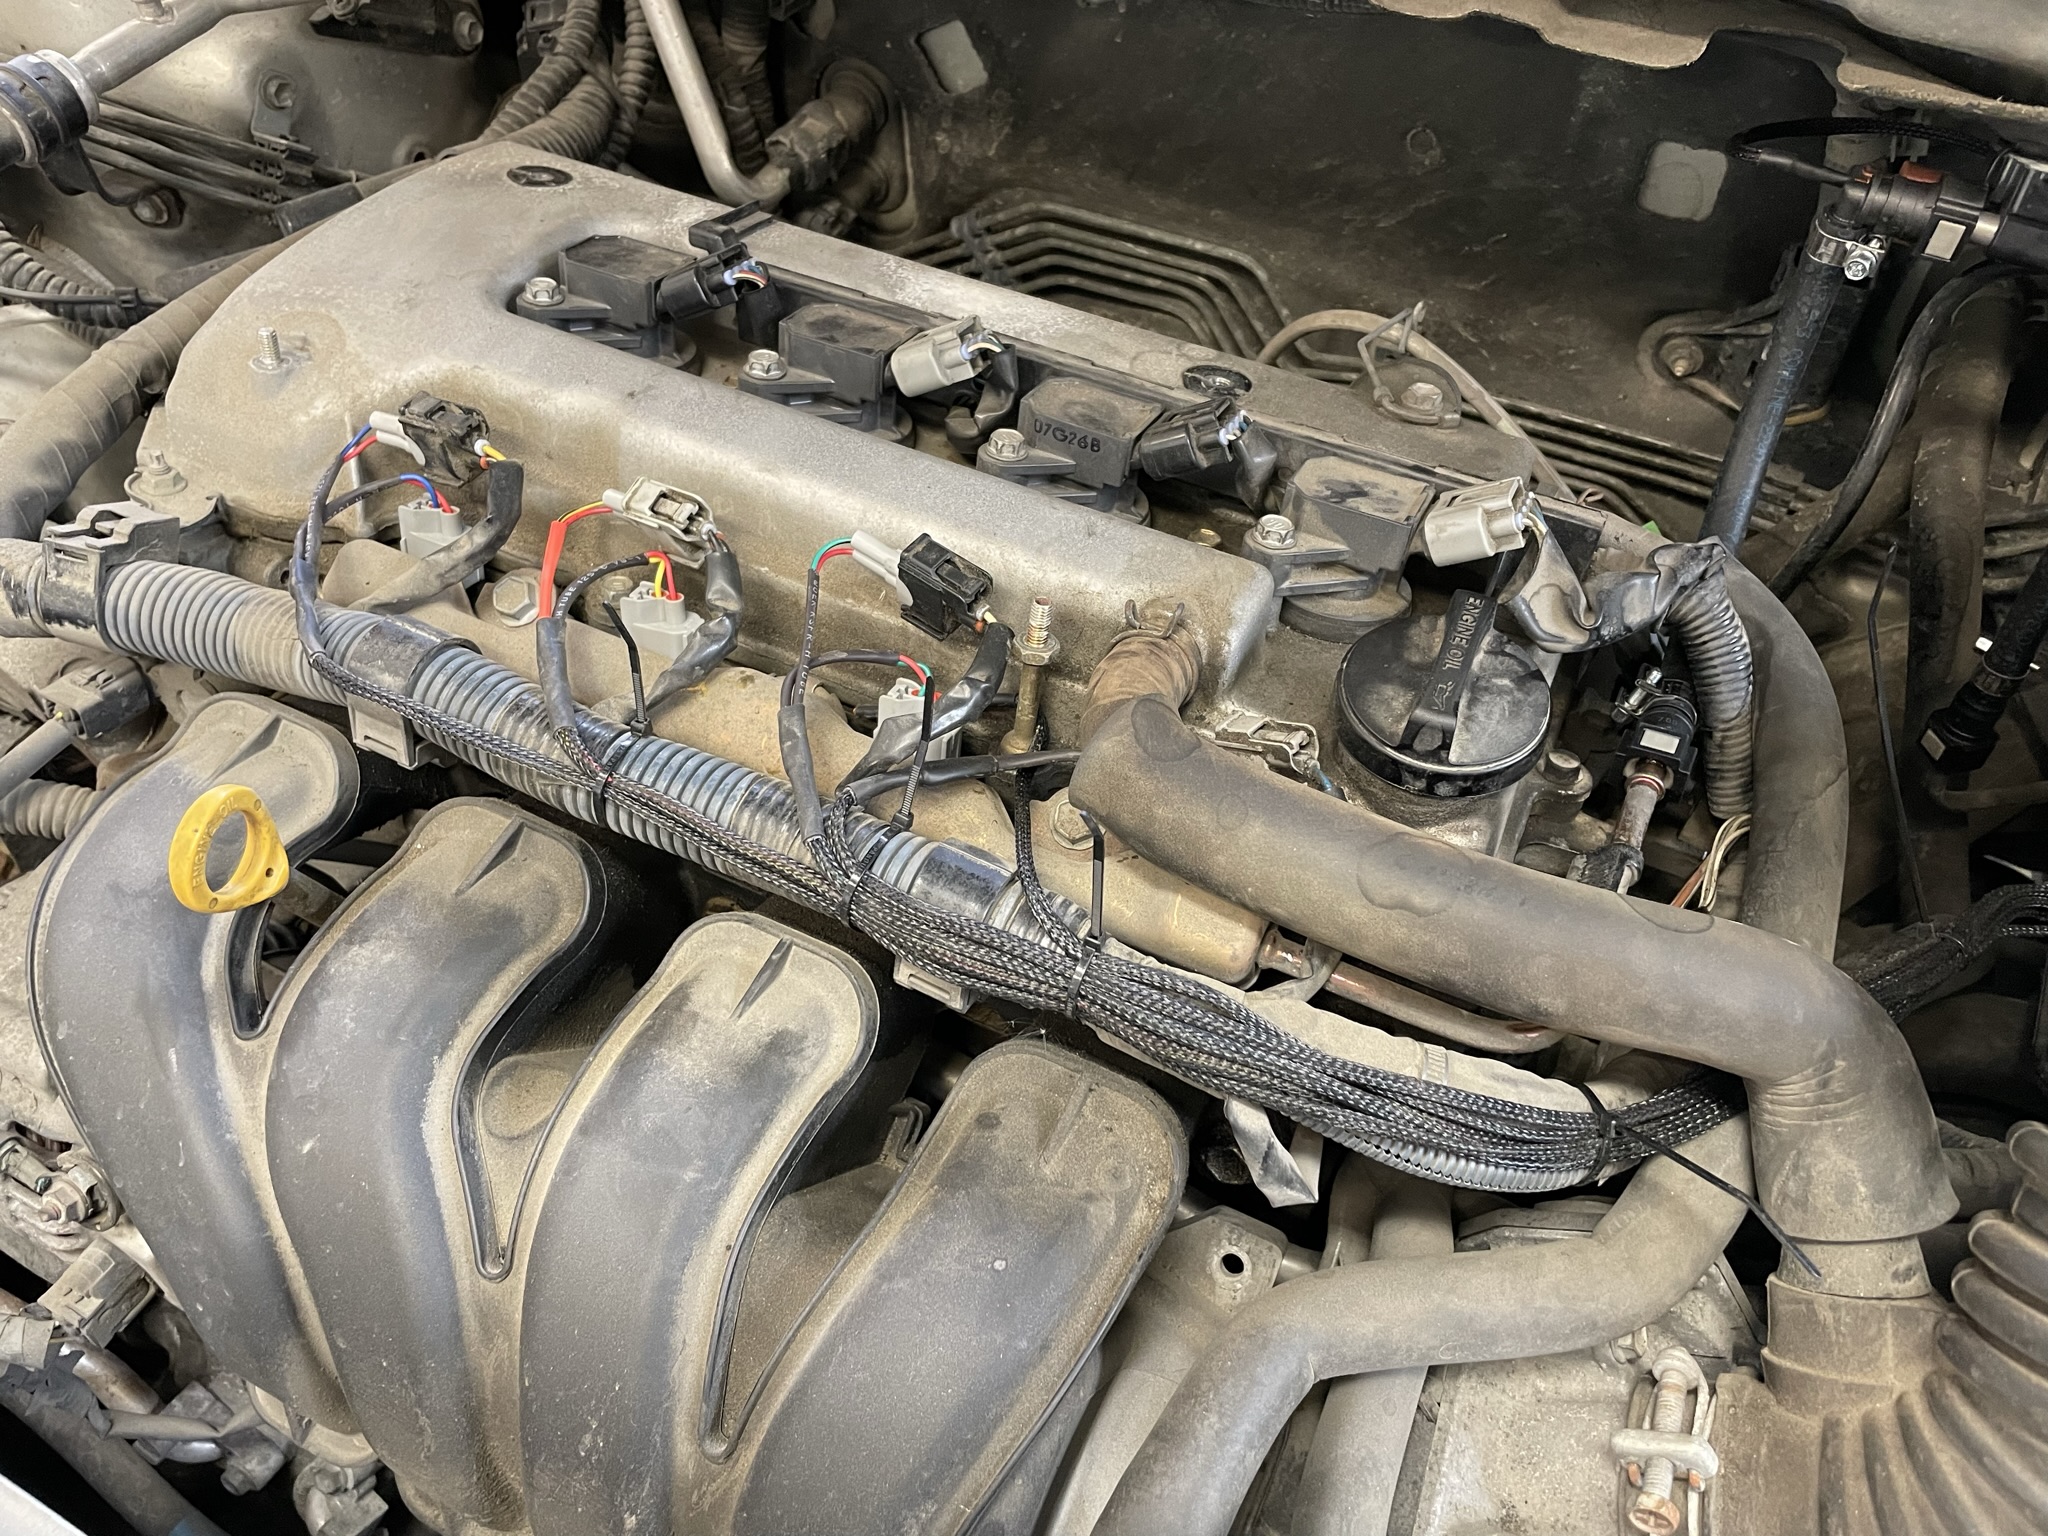
Wires ready to be plugged inside the connector. Also shows the positive wire going to injector positive:

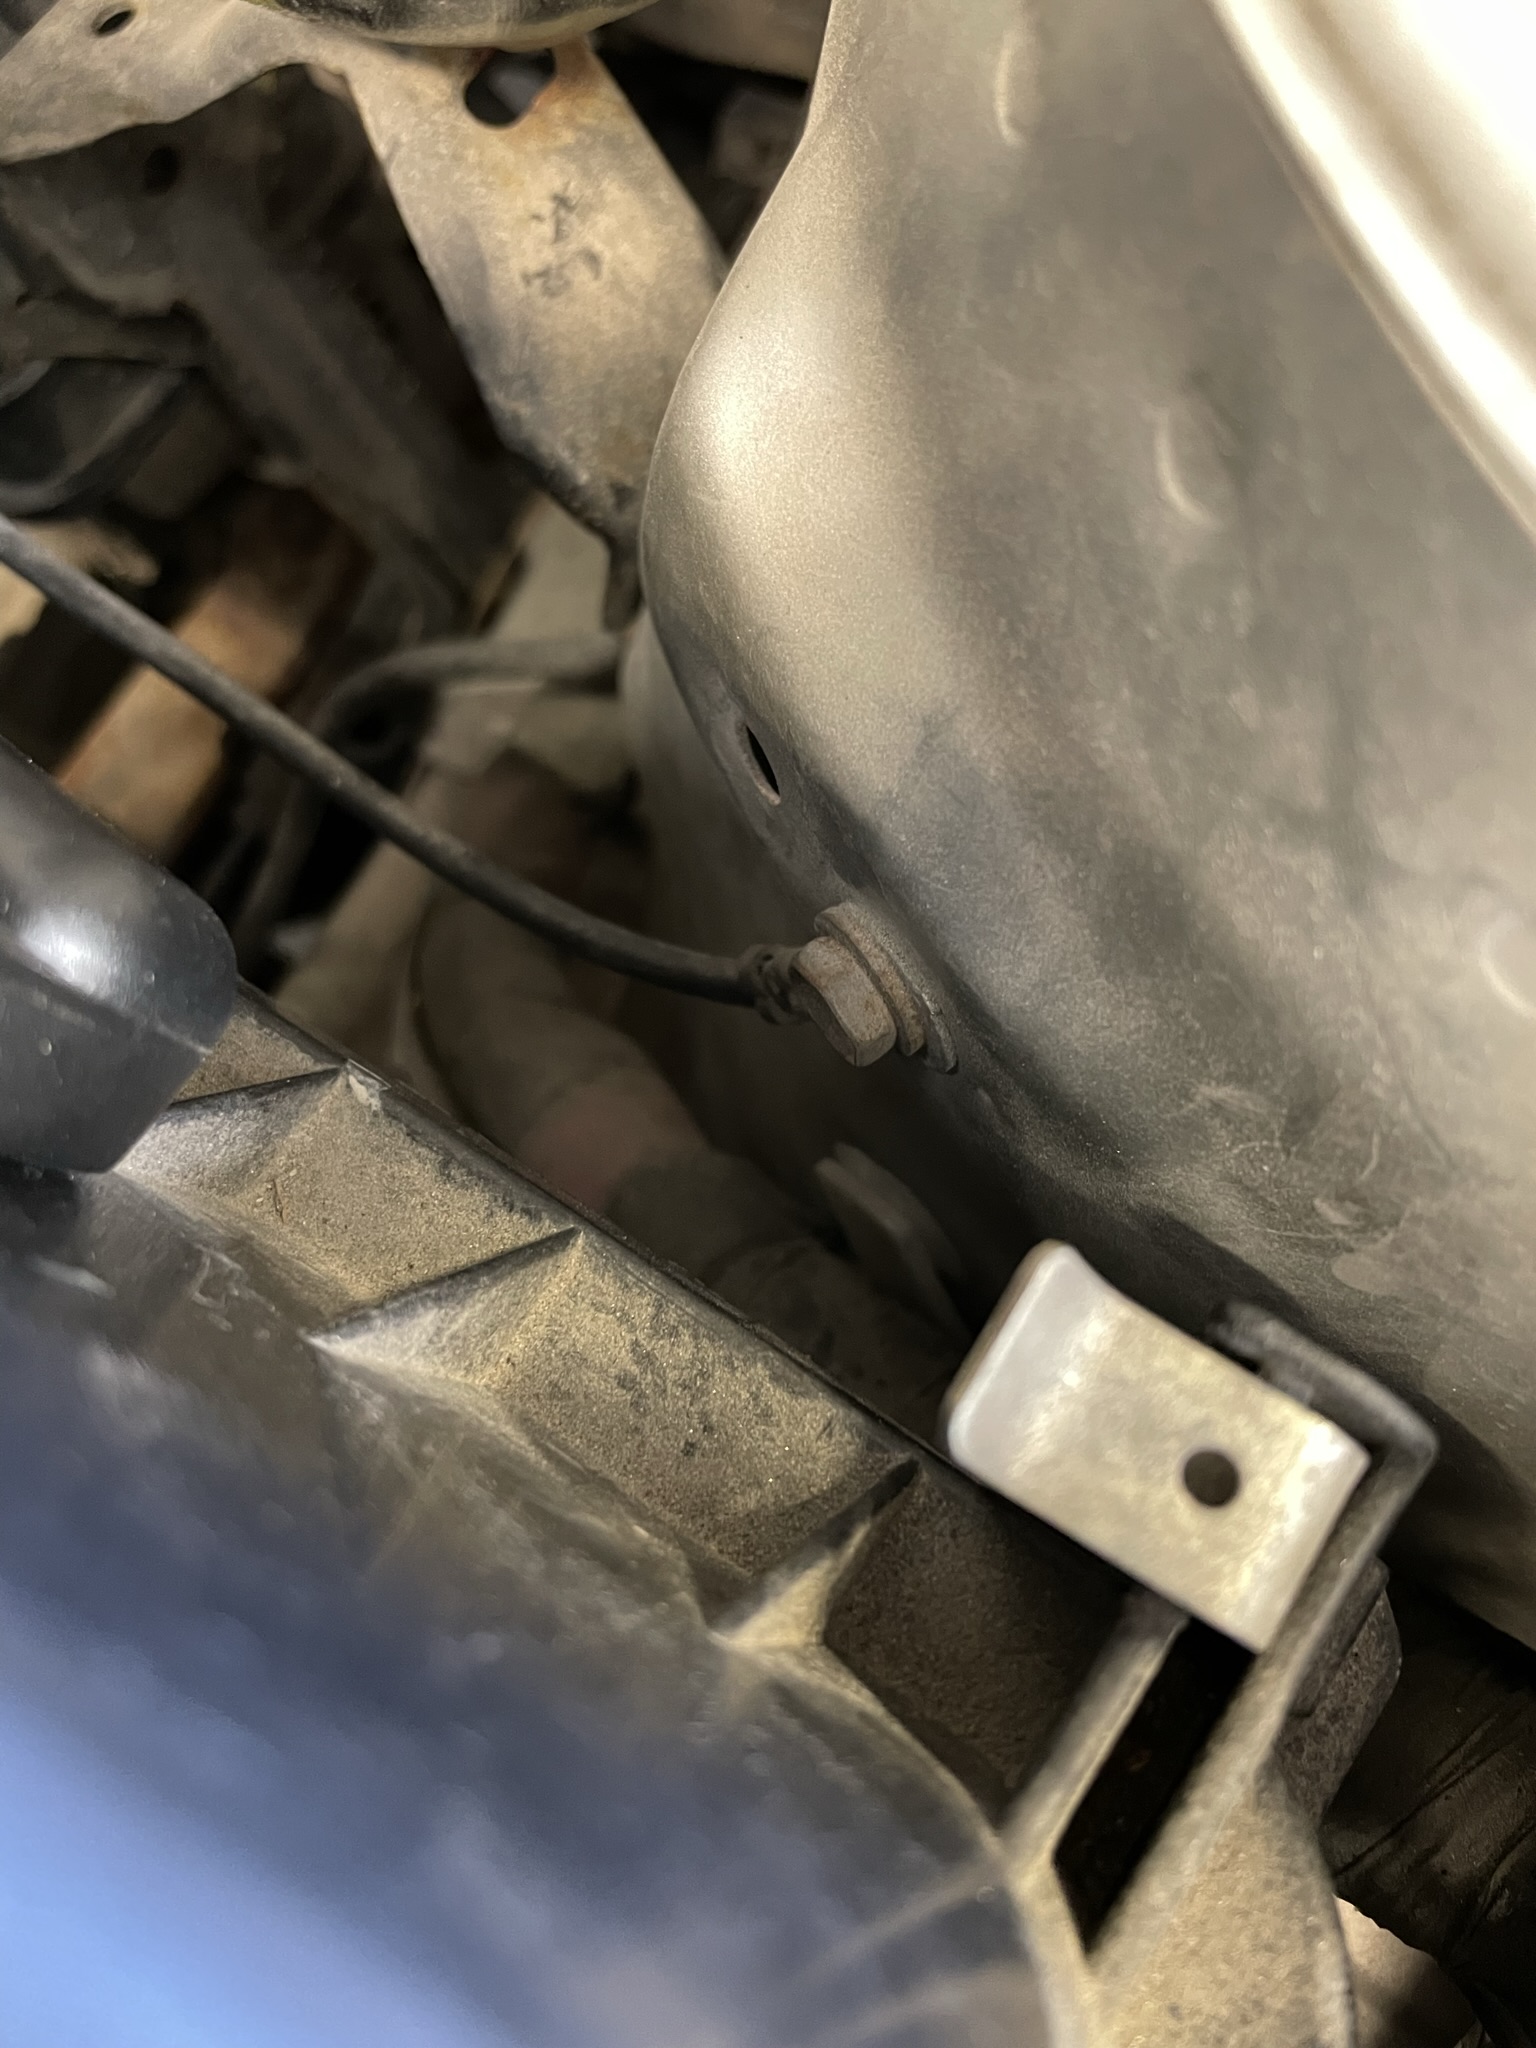
Step 6, ground for control box.
As it is with every old car, there will be rust. And of course the rust is attracted to bolts you need to remove. I snapped the original ground location bolt while opening it, so I had to make a new one next to it.
Original location:
Tapping the new hole with M6 tap:
Sand down to bare metal:
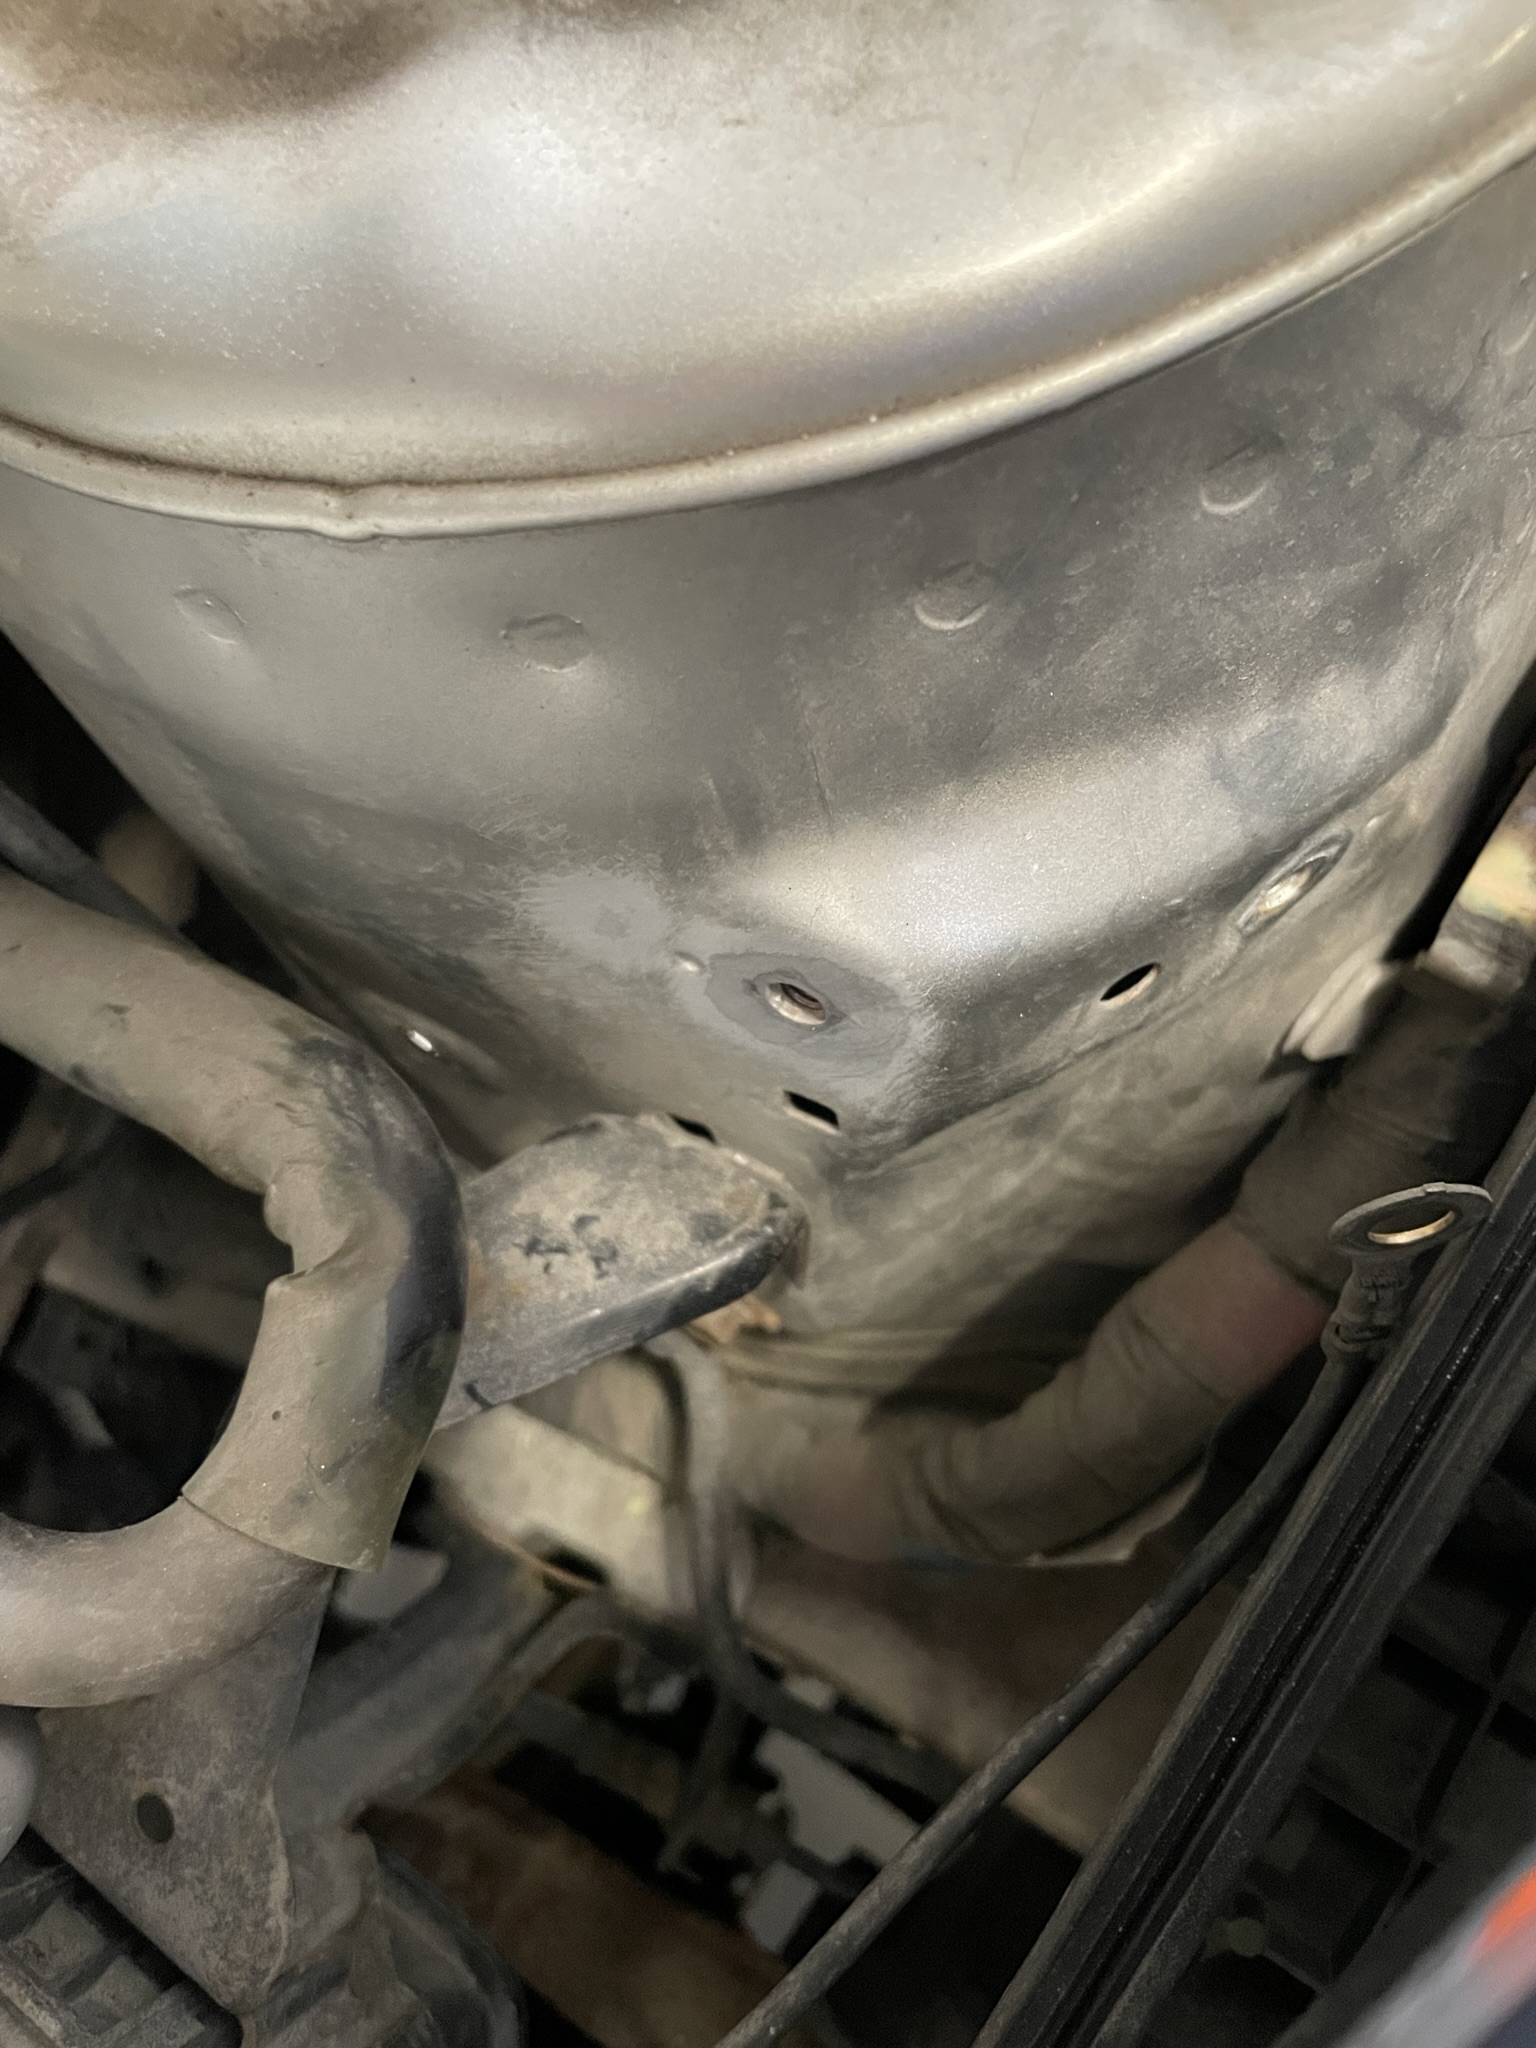
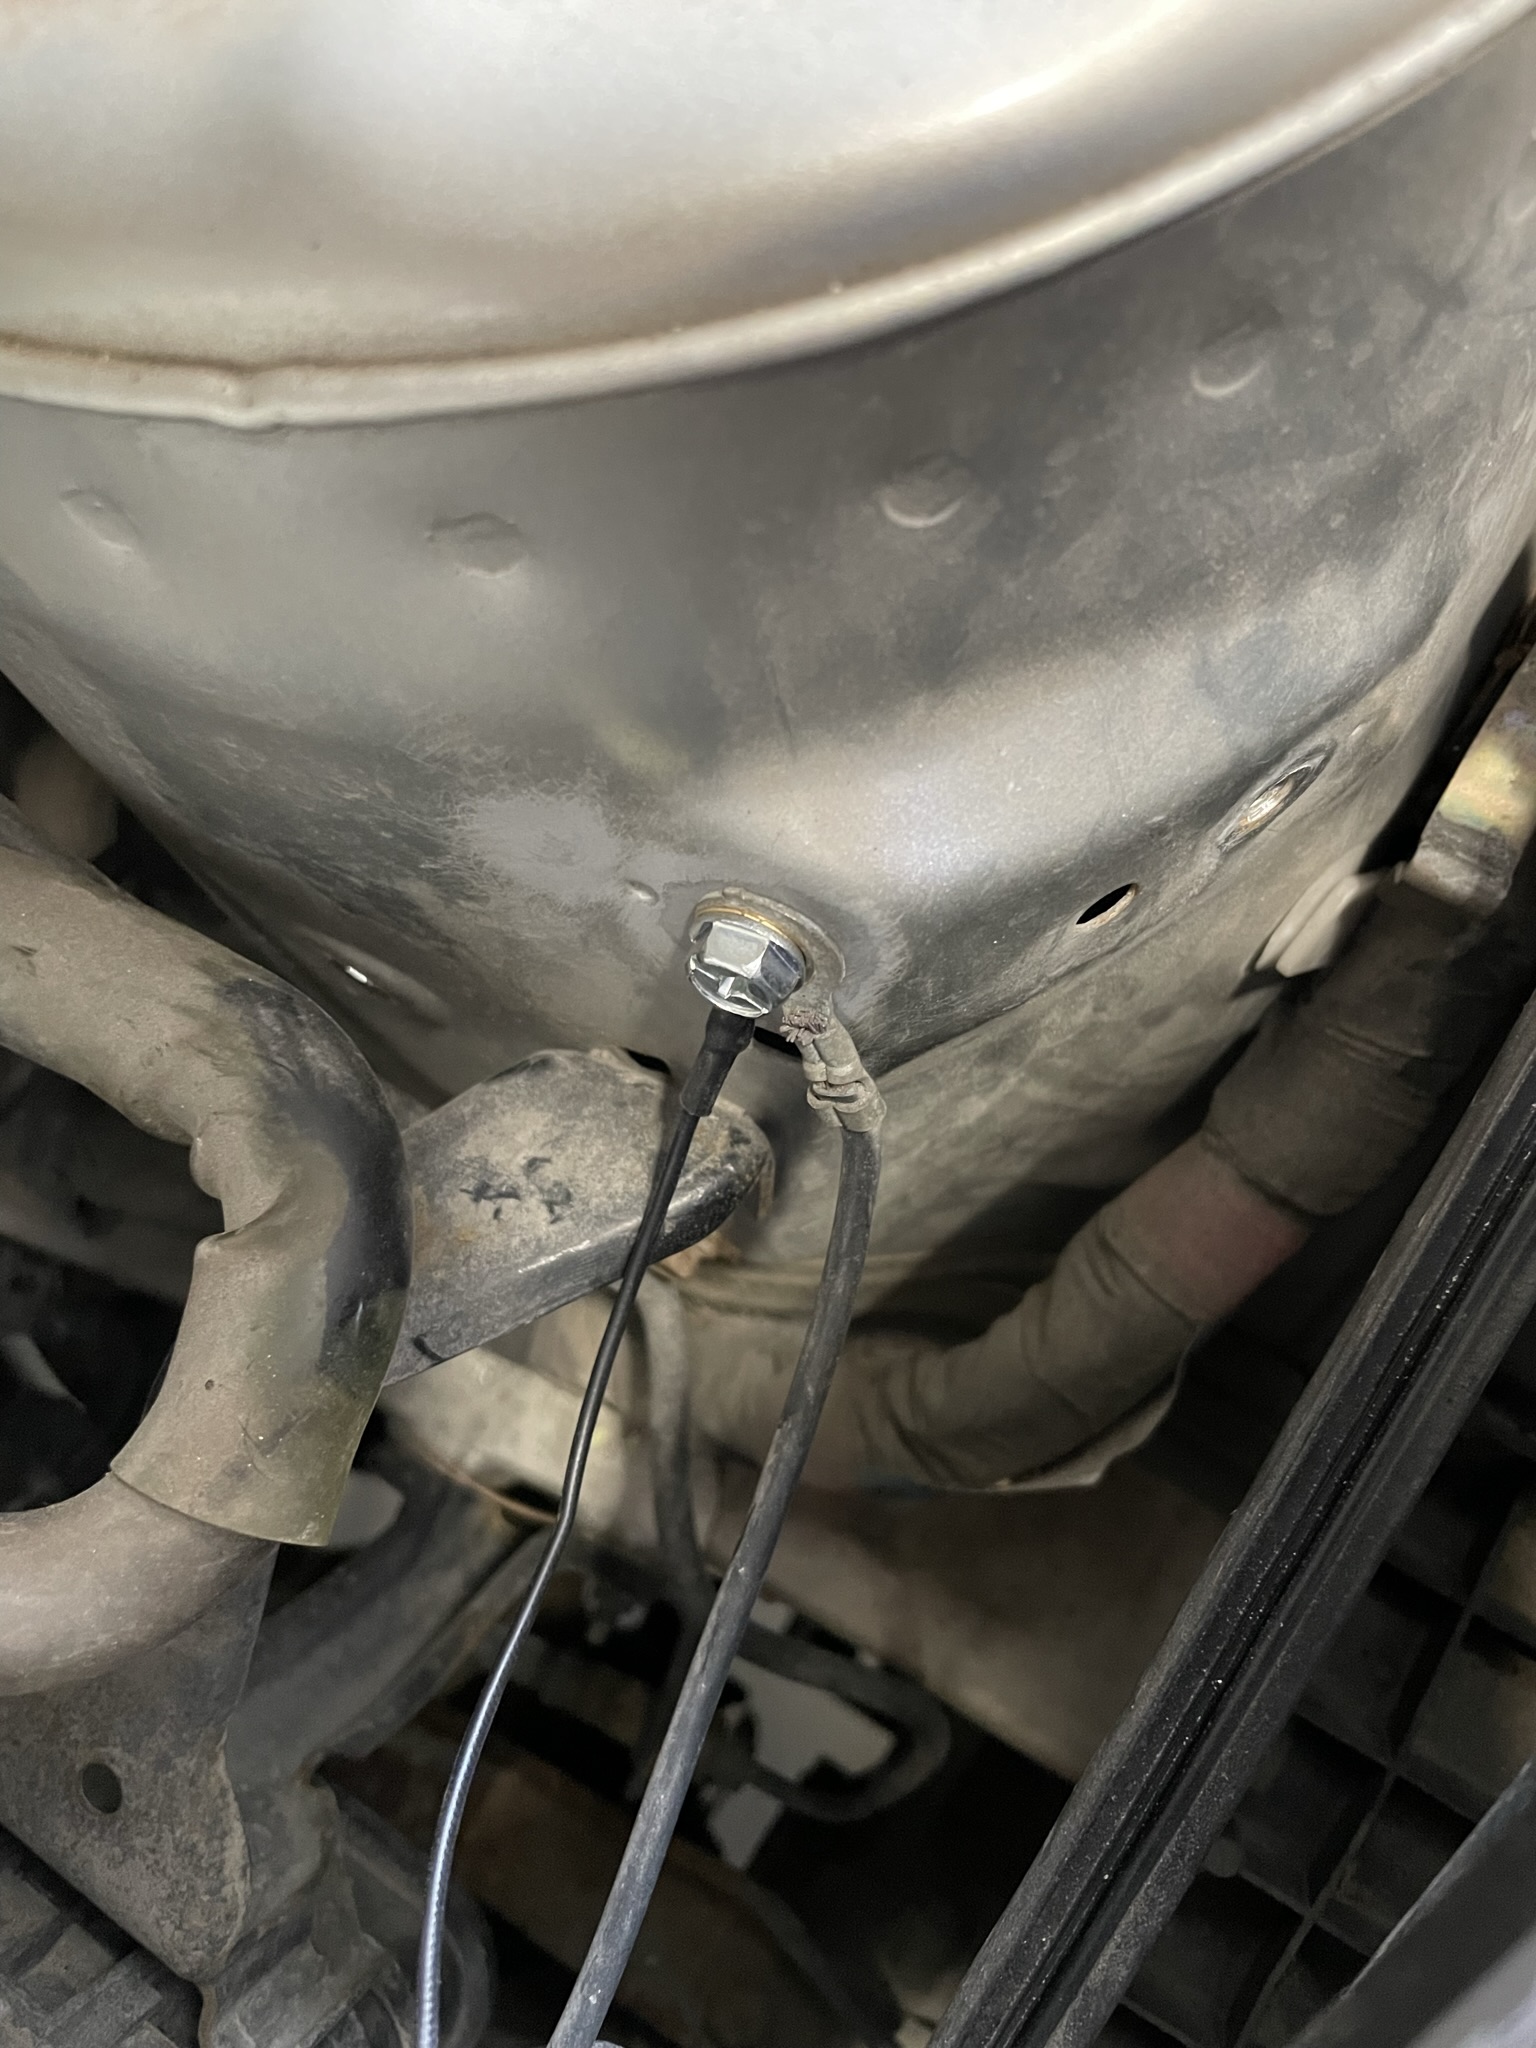
New ground point installed:
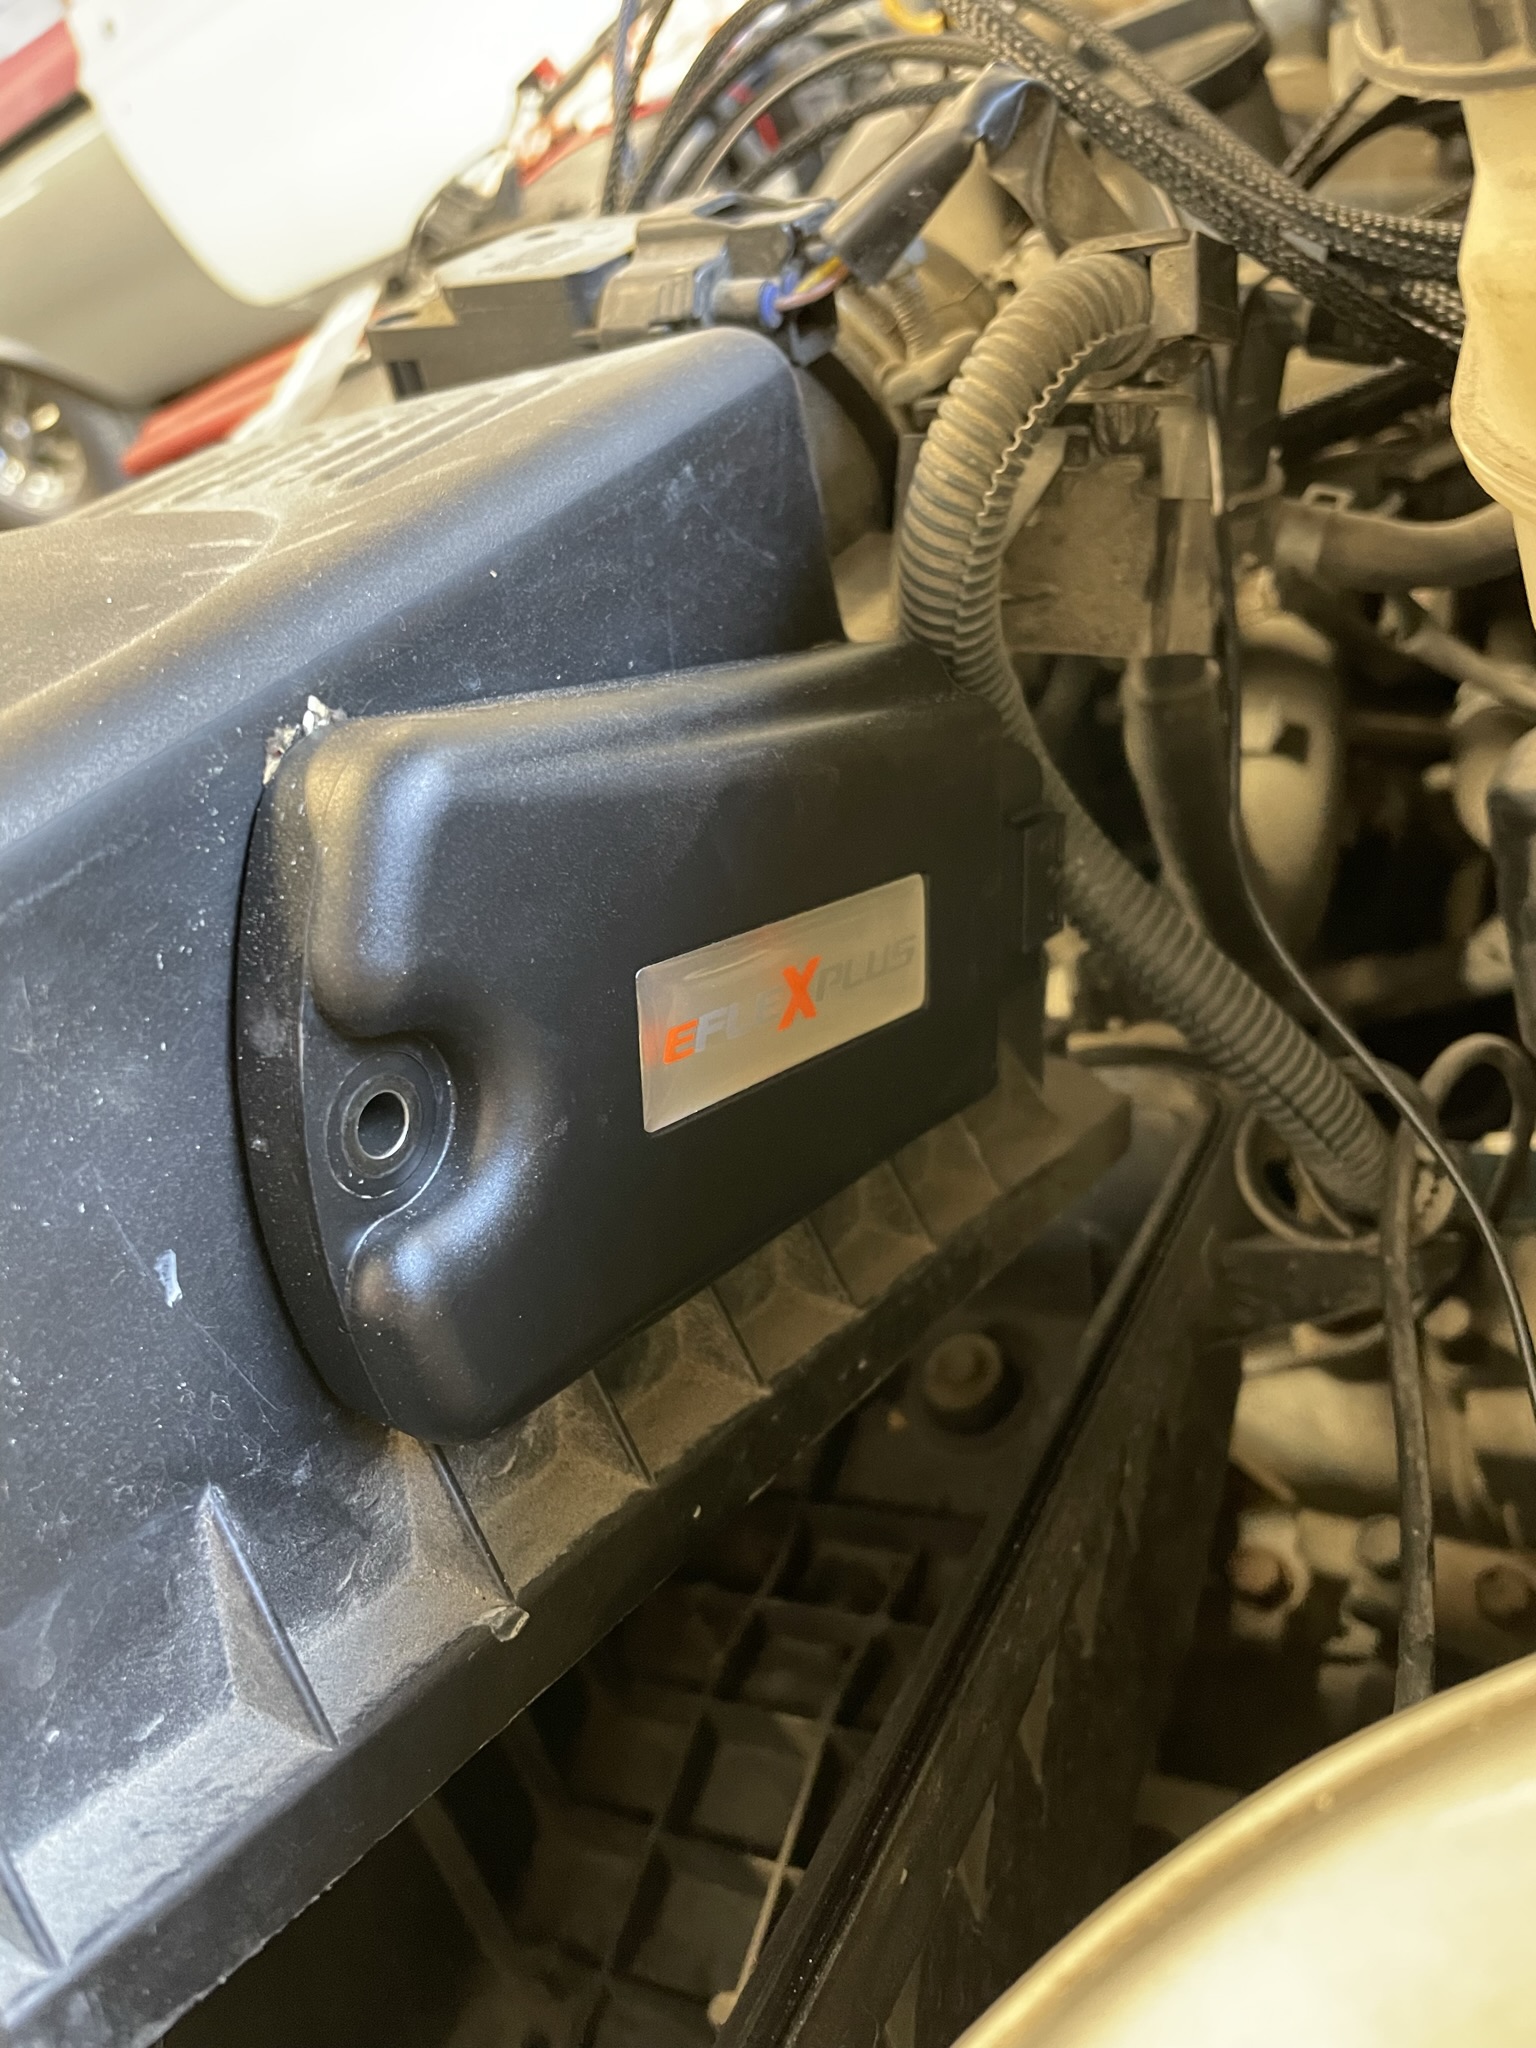
Step 7, control box install.
I installed the control box with double sided tape behind the airbox. There’s really no other good space, as every surface of the car seems to have something attached so that the box does not fit. I might make a bracket for this later, as tape and hot environments do not mix together well.
Step 8, plug in the wires.
Now plug in all the connectors to the control box and the flexfuel sensor.
Step 9, Clean up, connect battery and start the car.
Clean all fuel residue from engine bay, connect the battery and cycle the key few times to ignition and off. This will purge air out of the fuel system. First start might take a few tries, as the control box learns your injector order and timing.
Open the eFlexFuel app and make sure you have four active injectors, RPM is showing up and only error is “low ethanol content in fuel”.
Now your Corolla is flexfuel compatible!
Troubleshooting:
When you start using more and more ethanol fuel, monitor the injector usage while accelerating hard on high RPM’s. If the usage creeps up too close to 100%, that might indicate that either your fuel filter is clogged or stock fuel pump is on it’s way out. Because you will need 30% more ethanol than normal E10 or E5 fuel, your fuel pump needs to work 30% harder to supply enough fuel.